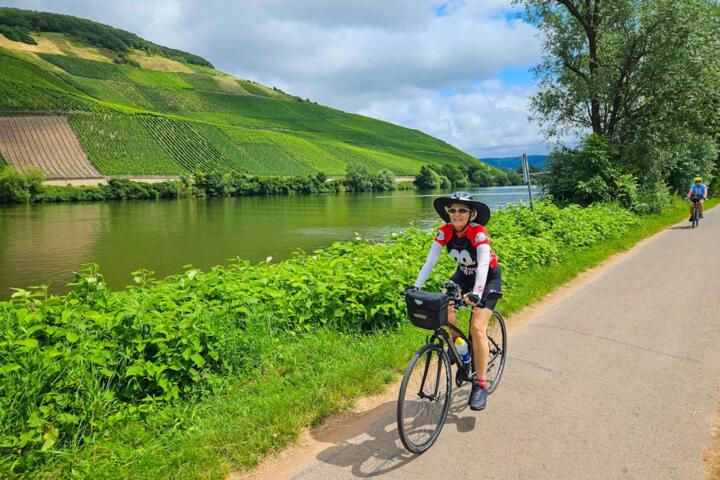
Cycling Tour Packing Basics
A cycling tour turns everyday riding gear into a moving system: clothing manages sweat and temperature, small spares prevent long delays, and health items reduce the odds that a minor issue becomes a multi-day problem. Packing starts with the route and schedule. A 3-day ride with daily lodging needs different quantities than a 10-day self-supported trip where you carry more food and repair materials.
Plan around three constraints: weight, access, and time. Weight matters because every extra kilogram affects climbing and fatigue. Access matters because you need items you’ll use daily—rain layer, lights, chamois cream, and water treatment—within easy reach. Time matters because you cannot stop for a 30-minute rummage when you’re dealing with a flat, a soaked jersey, or a sudden cold front.
For a concrete example, a typical day might include 2–4 hours in the saddle, 1–2 weather changes, and at least one “maintenance moment” such as wiping chain grime or checking tire pressure. Your packing list should support those moments without turning your panniers into a storage maze. I once watched a rider spend 12 minutes digging for a CO2 cartridge because it was buried under spare socks; that delay felt small until it happened twice.
Pain Points Riders Commonly Hit
Most packing problems come from mismatched assumptions. Riders often pack for “average weather” and then get surprised by wind chill, nighttime temperature drops, or rain that soaks through fabric. Another frequent issue is underestimating how quickly small items disappear: one missing zip tie, one lost tire lever, or one empty blister patch can derail the rest of the trip.
Gear dependencies also matter. A repair kit only works if you carry the right tools for your tire and wheel type. Tubes require a compatible valve stem and a way to seat the bead; tubeless tires require sealant and a method to reinflate. If your bike uses disc brakes, your pad wear and rotor contamination risk differ from rim brakes, and your cleaning approach changes.
Health-related packing errors tend to be subtle. Many riders bring sunscreen but forget lip protection, then end up with cracked lips that make it hard to drink comfortably. Others pack a first-aid kit that lacks blister care or basic pain relief. A kit that looks “complete” on day one can still fail if it lacks the specific items you need for friction and minor injuries.
Finally, riders sometimes ignore the “laundry reality.” If you plan to wash jerseys in a sink, you need a way to dry them fast enough to ride the next day. Without a dry plan, you end up riding in damp clothing, which increases chafing and can worsen cold exposure. That’s not a moral lesson; it’s physics and fabric behavior.
Solutions And Advice
Clothing Layers And Fit
Pack layers that match your temperature range and wind exposure. A common approach uses a base layer that wicks, a mid-layer for warmth, and a rain shell that blocks wind-driven rain. Choose fabrics that dry reasonably fast; cotton jerseys dry slowly and can keep you cold after a downpour.
For cycling-specific comfort, include at least two ride-ready kits if you expect wet weather or long days. One jersey and shorts set can be drying while you ride in the other. If you use chamois cream, pack it in a small container and keep it separate from tools so it doesn’t get contaminated with grit.
Footwear deserves extra attention. Bring socks designed for cycling and consider a second pair for days with heavy sweat. If you wear clipless shoes, pack a spare set of cleat bolts or at least a small tool to adjust cleat position; a tiny misalignment can cause hot spots that show up later as blisters.
As an incidental detail, I’ve seen riders overpack “just in case” gloves and then leave them behind because they never fit over their preferred base layer. A quick test at home—wearing the gloves for 10 minutes while holding handlebars—catches that mismatch early.
Bike Spares And Tools
Build a repair kit around your bike’s tire setup and your comfort level. At minimum, most riders carry tire levers, a pump or inflator, and spare tubes or tubeless sealant plus a reinflation method. Add a patch kit for tubes, plus a small roll of electrical tape or a few zip ties for quick fixes.
Include tools that match your fasteners: a multi-tool with the right hex sizes, a chain tool if you can’t quickly swap a chain link, and a small wrench if your bike uses unusual bolts. If you run tubeless, sealant age matters; sealant can dry out over time, and the “it should still work” assumption often fails after months of storage.
For brakes, carry a basic cleaning wipe and a small bottle of isopropyl alcohol if your pads are sensitive to contamination. Rotor rub can be fixed with careful alignment, but it’s easier to prevent by keeping oil off rotors during maintenance. A side observation: the tiny bottle that leaks in a pannier is usually the one you packed last-minute; cap it with tape or store it in a sealed bag.
Don’t forget the small consumables. Chain lube in a travel-size container, a rag, and a nitrile glove can keep maintenance from turning into a full afternoon. If you’re riding in wet climates, a dry bag for electronics and a separate bag for tools reduces corrosion risk.
Health, Hydration, And Sun
Pack items that address the most common cycling discomforts: friction, dehydration, and sun exposure. For friction, include blister care such as hydrocolloid patches and a small roll of tape or kinesiology tape. For dehydration risk, carry a way to treat water if your route has uncertain supplies, such as filter bottles or tablets; follow the manufacturer’s contact time and dosing guidance.
Include basic pain relief and an anti-inflammatory medication if you already use it safely in daily life. Add an oral rehydration solution packet or electrolyte tablets for days with heavy sweating. For sun, pack sunscreen with broad-spectrum coverage and lip balm with SPF; reapply based on exposure and sweat, not on a guess.
Consider a thermometer or at least a way to monitor symptoms if you’re prone to illness during travel. A first-aid kit should include sterile gauze, adhesive bandages, antiseptic wipes, and tweezers for splinters. If you have allergies, carry your prescribed medication and keep it accessible rather than buried.
If you’re riding long distances, include a plan for nutrition timing. Many riders underpack carbs and then hit fatigue that feels like “fitness” but behaves like low fuel. Pack familiar snacks you tolerate during exertion, and store them where you can reach them without stopping.
Navigation, Power, And Paperwork
Carry navigation tools that work offline when possible. A phone with downloaded maps can reduce reliance on signal, but you still need a charging plan. Pack a power bank sized for your device and a cable that matches your phone model. I’ve used a 10,000 mAh power bank on a 2024 summer ride; it lasted longer than expected because I kept screen brightness low and used turn-by-turn audio.
Bring lights if you ride near dawn, dusk, or in tunnels. Even if you plan to finish early, weather delays happen. Include reflective items for visibility in rain and fog.
Paperwork depends on your trip type. For international travel, keep passport and insurance details in a waterproof sleeve. For domestic tours, carry a driver’s license or ID if you plan to use shuttles or bike transport services. Store emergency contacts in a place you can access even if your phone battery dies.
Pack a small amount of cash and a card. Card readers can fail, and some rural services use cash-only policies. Keep money in two separate locations so a single loss doesn’t remove all options.
Case Examples For Realistic Planning
Three Days With Lodging
A rider doing a 3-day route with nightly lodging packs two sets of cycling shorts and jerseys, one rain shell, and a compact repair kit with two tire levers, one spare tube, a patch kit, and a mini pump. They carry blister patches and a small electrolyte mix, plus sunscreen and lip balm. Because laundry is possible at the lodging, they pack fewer socks and plan to wash and dry overnight.
They also pack a small tool for their specific pedals and a rag for chain grime. The rider keeps tools in a single pouch so a flat doesn’t require unpacking everything. Their biggest risk is rain soaking clothing; they solve it by bringing a second jersey and drying the first in the room.
Ten Days Self-Supported
A self-supported rider on a 10-day tour carries more spares and consumables because they cannot rely on shops every day. Their kit includes two spare tubes, a patch kit, a larger inflator option, and a few extra zip ties and cable ties. They also pack a small bottle of chain lube, a rag, and a way to clean rotors if needed.
For health, they pack blister care, gauze, antiseptic wipes, and electrolyte tablets. They carry a water treatment method appropriate for their route and follow the label’s contact time. Their packing decision focuses on redundancy: if one item fails, they still have a working backup without waiting for a store.
Packing Checklist And Tradeoffs
| Category | Pack For Lodging Tours | Pack For Self-Supported Tours | Common Tradeoff |
|---|---|---|---|
| Repair kit | 1 spare tube, mini pump, levers, patch kit | 2 tubes (or tubeless sealant + reinflation), extra ties, more tools | More redundancy adds weight |
| Clothing | 2 ride sets, rain shell, 1–2 sock pairs | 2–3 ride sets, faster-drying layers, more socks | Drying limits how many sets you can carry |
| Health items | Blister patches, gauze, antiseptic wipes, electrolytes | Larger blister supply, extra gauze, more electrolytes | More supplies reduce risk but add bulk |
| Water plan | Treat only if route supplies are uncertain | Carry treatment method and follow label contact times | Treatment gear adds weight and time |
Use this step-by-step checklist to avoid last-minute omissions. First, list your bike’s tire setup and brake type, then match tools to those specifics. Next, write down your expected temperature range and rain probability, then choose layers that cover the extremes. Then, pack health items for friction and hydration based on your typical symptoms. Finally, test your “daily access” by packing your bag and reaching for the rain layer, a snack, and a tool without unpacking everything.
Common Mistakes That Cost Time
Riders often pack a repair kit that matches a different bike. A CO2 cartridge that fits one inflator head may not fit another, and a patch kit that works for one tube material may not adhere well in cold conditions. Match parts to your current setup before you leave home.
Another mistake is ignoring drying time. A rain-soaked jersey that dries in two hours at home might take eight hours in a humid hostel. Packing a second set and planning where you’ll dry gear reduces chafing and cold exposure.
Some riders underpack nutrition and overpack “comfort.” A heavy camp chair is rarely the problem; low-carb fatigue is. If you tend to bonk, pack carbs you tolerate during exertion and plan where you’ll refill.
People also forget that blister prevention is a process, not a single product. If you use hydrocolloid patches, carry enough for the number of hot spots you usually get. If you rely on tape, bring a small roll and practice applying it while your hands are slightly sweaty—doing it once at home saves time later.
Finally, riders sometimes skip a basic visibility check. Lights that work on a desk test can fail on the road if batteries are old or connections are loose. A quick pre-ride check the night before reduces the “why won’t it turn on” moment.
FAQ
What Should I Pack For Rain?
Bring a windproof rain shell that covers your torso and a way to protect hands and feet if your route includes wet descents. Pack a small dry bag for electronics and keep a spare jersey or base layer if you expect repeated downpours.
How Many Spare Tubes Do I Need?
For short lodging tours, one spare tube plus a patch kit often covers a single puncture. For self-supported routes, carry two tubes or a tubeless plan with sealant plus reinflation, since repairs may take longer and shops may be far apart.
What First Aid Items Matter Most?
Include blister care (hydrocolloid patches or blister-specific dressing), sterile gauze, adhesive bandages, antiseptic wipes, and tweezers. Add your usual pain relief medication if you already tolerate it, and keep allergy medication accessible.
Do I Need Water Treatment On Every Tour?
Use water treatment when your route has uncertain water quality or inconsistent supply. Follow the product label for contact time and dosing, and carry enough capacity to avoid running out between refill points.
How Should I Pack Electronics And Power?
Store your phone, cables, and power bank in a waterproof pouch. Download maps for offline use, carry a compatible charging cable, and keep a small backup power plan so navigation still works after a long day.
Author's Insight
Cycling tour packing works best when you treat it like a system with dependencies: tools match your tire setup, clothing matches your temperature range, and health items match your common friction and hydration issues. Riders often save weight by removing duplicates, but they lose time when a single missing item forces a long repair or a detour. A practical approach is to pack, then simulate a flat tire and a rain change at home to confirm you can reach what you need quickly. If you’re unsure about water treatment or medication choices, check product labels and your clinician’s guidance before travel.
Key Takeaways
Pack layers for temperature swings and wind, not just daytime comfort. Match your repair kit to your tire setup and brake type, then test access so you can reach tools fast. Carry blister care and hydration support based on your typical symptoms, and plan drying for wet clothing. Use a checklist tied to your route length and support level so you don’t overpack or leave out the one item that matters on day three.